
| 일 | 월 | 화 | 수 | 목 | 금 | 토 |
|---|---|---|---|---|---|---|
| 1 | 2 | 3 | 4 | 5 | ||
| 6 | 7 | 8 | 9 | 10 | 11 | 12 |
| 13 | 14 | 15 | 16 | 17 | 18 | 19 |
| 20 | 21 | 22 | 23 | 24 | 25 | 26 |
| 27 | 28 | 29 | 30 |
- vscode
- TypeScript
- Redux
- java
- Data Structure
- network
- Python
- LeetCode
- 백준
- Javascript
- DP
- 자바
- 그레이들
- Algorithm
- BFS
- Database
- db
- frontend
- VIM
- 다이나믹 프로그래밍
- 안드로이드
- DFS
- 알고리즘
- 리트코드
- Graph
- react
- CS
- 동적 계획법
- 프로그래머스
- git
- Today
- Total
늘 겸손하게
React - React에 Redux 설치 & 초기 설정 본문
목차
React에 Redux 설치
React를 활용한 토이 프로젝트를 개발하다 Redux를 설치할 일이 생겼다. Redux를 설치하고 초기 설정을 해보자.
출처 : https://react-redux.js.org/tutorials/quick-start
Quick Start | React Redux
react-redux.js.org
1. 프로젝트에 Redux Toolkit, React Redux 설치
터미널을 열고 아래 코드를 입력하여 프로젝트 패키지에 Redux Toolkit, React Redux를 설치할 수 있다.
npm install @reduxjs/toolkit react-redux
2. Redux Store를 생성한다.
src/app 위치에 store.js 파일을 생성한다.
Redux Toolkit에서 configureStore API를 불러온다.
import { configureStore } from '@reduxjs/toolkit'

export default configureStore({
    reducer: {},
})
위 코드는 Redux store를 생성하고 자동으로 Redux DevTools extension을 설정해주어 개발중에 store를 검사할 수 있도록 해준다.
3. React에 Redux Store를 제공
index.js에서 App 컴포넌트를 Provider 컴포넌트로 감싼 뒤 생성한 store를 props로 전달한다.
import React from 'react';
import ReactDOM from 'react-dom/client';
import './index.css';
import App from './App';
import store from './app/store';
import { Provider } from 'react-redux';

const root = ReactDOM.createRoot(document.getElementById('root'));
root.render(
  <Provider store={store}>
    <App/>
  </Provider>
);
4. Create a Redux State Slice
/src/features/counter/counterSlice.js 라는 파일을 생성한 후, createSlice API를 Redux Toolkit에서 import 한다.
slice를 생성하기 위해서는 다음 세 가지가 필요하다.
- name (이름)
- initial state value (초기 상태 값)
- reducer function (한 개 이상의 reducer 함수) → state가 업데이트되는 방식을 정의
slice가 생성되면 생성된 Redux action creators와 educer를 export 할 수 있다.
Reducer 자동 불변성
Redux는 모든 상태 업데이트가 불변성을 지키며 이루어져야하나, Redux Toolkit의 createSlice와 createReducer API는 내부에서 Immer를 사용해 불변성을 지키지 않은 로직을 불변성을 지키는 업데이트로 바꾸어준다.
import { createSlice } from '@reduxjs/toolkit'

export const counterSlice = createSlice({
  name: 'counter',
  initialState: {
    value: 0,
  },
  reducers: {
    increment: (state) => {
      state.value += 1
    },
    decrement: (state) => {
      state.value -= 1
    },
    incrementByAmount: (state, action) => {
      state.value += action.payload
    },
  },
})

// Action creators are generated for each case reducer function
export const { increment, decrement, incrementByAmount } = counterSlice.actions

export default counterSlice.reducer
5. Store에 slice reducer 담기
store.js 코드에서 store의 reducer 파라미터에 생성한 slice reducer를 정의한다.
이를 통해 앞으로 counter state는 해당 slice reducer를 통해서만 업데이트하라고 명시할 수 있다.
import { configureStore } from '@reduxjs/toolkit'
import counterReducer from '../features/counter/counterSlice'

export default configureStore({
  reducer: {
    counter: counterReducer,
  },
})
6. React 컴포넌트 내부에서 Redux State, Action 사용하기
이제 리액트 컴포넌트는 React Redux Hook을 통해 Redux store와 상호작용할 수 있다.
useSelector를 통해 store의 데이터를 읽을 수 있고 useDispatch를 통해 action을 보낼 수 있다. (action == 업데이트 신호)
import { useDispatch, useSelector } from 'react-redux';
import { decrement, increment } from './features/counter/counterSlice';
import './App.css';

function App() {

  const count = useSelector((state) => state.counter.value);
  const dispatch = useDispatch();

  return (
    <div className="App">
        <div>
          <button
            aria-label="Increment value"
            onClick={() => dispatch(increment())}
          >
            Increment
          </button>

          <button
            aria-label="Decrement value"
            onClick={() => dispatch(decrement())}
          >
            Decrement
          </button>
        </div>

        <div>
          <span>{count}</span>
        </div>
    </div>
  );
}

export default App;
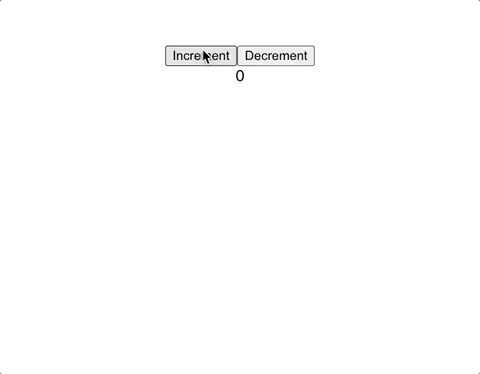
increment 버튼을 클릭하면 increment action이 store에 전송되고, decrement 버튼을 클릭하면 decrement action이 store에 전송됩니다.
counterSlice reducer가 action을 보고 알맞게 state를 업데이트합니다.
store의 state가 업데이트되면 App 컴포넌트는 변경된 state값을 읽고 새로 리렌더링됩니다.
마무리
코드 실행 결과
'Programming > React' 카테고리의 다른 글
| React - 컴포넌트 기반 아키텍처 (0) | 2023.09.13 |
|---|---|
| React - Github-pages에 배포하기 (0) | 2023.07.28 |
| React - React Hook & 장점 (0) | 2023.06.29 |
| React - 프러젠테이셔널 컴포넌트 & 컨테이너 컴포넌트 (0) | 2023.06.12 |
| React - shouldComponentUpdate() (0) | 2022.08.22 |
